Dividing dahlias, ah it’s one of the most wonderful times of the garden year! The most glorious things about dahlias is, they are a one-time buy. Once you found and collected these coveted flowers, you will be able to grow them (for FREE) in perpetuity as long as you complete the not-as-daunting-as-you’d-exspect task of dividing dahlias.

Dahlias are magical because you plant a single tuber (misshapen potato-like seed) and over the growing season it multiplies into a clump of many.

Once we’ve had two killing frosts, which is easily recognizable because your once happy dahlia plants are now shriveled and black, I go around and cut off the above ground growth at the base leaving several inches of stalk (so I know where to dig later). It’s also important to note, as I do this I label each variety. It may seem redundant with all your in ground labels and garden notebook plant maps, but I find you can never label enough!
Digging Dahlias
Next thing to do is dig—and start 9-12″ away from the base of your plant. I use a combination of a long-handled shovel and fork to lift the clump up and out of the ground. And even though we try our best, even the most careful of gardeners will cut or spear a tuber a tuber in the process, s0 don’t worry too much if this happens.

Cleaning the Tubers
Now WASH! At the back of our property is a slope into the woods which is perfect for the water runoff. One by one I’ll use a pressurized hose nozzle to spray the tubers down to wash as much of the soil off as possible. Make sure they still have their labels and let them dry in a cool (40-50ºF), dry place.

And here’s the tricky-but-fun part.
Dividing Dahlia Tubers.
Using sharp anvil pruners (cause they are stronger) I cut the main clump in half. Then I divide the remaining two pieces in half until I have 4 pieces of dahlia tuber clumps. Look at each of these more manageable pieces and look for healthy tubers with eyes. Healthy tubers are firm with strong necks. Dividing dahlias is actually much easier than it looks, it just takes practice.

And in case you missed it, here’s the most important part again:
YOU MUST INCLUDE AT LEAST ONE EYE on every tuber.

A tuber eye is the small raised bump on the neck (near the top) of the tuber. This is the growing point for the dahlia next season. Without these you will not be able to grow anything, which is why its important to make sure each tuber you store has one.

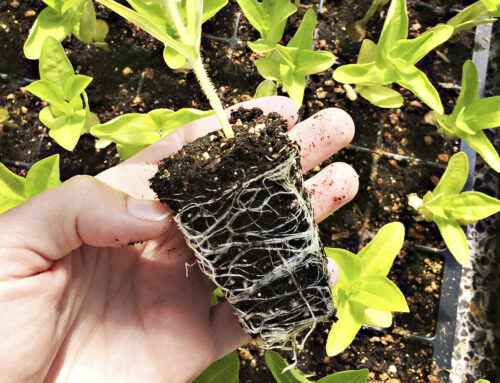
You can see the sprouts from the eyes on these dahlia tubers ready to plant in spring.
Now using my more delicate flower snips (make sure they’re sharp otherwise they may tear more than cut) to cut away one healthy tuber making sure to include at least one eye. Cut away any dangly roots and trim the ends. Don’t worry, these ends will cure! Use a sharpie marker to write the variety name directly on the flattest part of the tuber. It may not be super easy to write on, but I promise it won’t harm the tuber.

Keep in mind as you continue through the process of dividing there will be tubers without eyes. I send mine to the compost heap.
Storing Dahlia Tubers
Now that you have lots of happy, healthy dahlia tubers, you need to store them for next spring. Although I’ve done this successfully several different ways over the years, currently I’m using a large tupperware tub. I lay the separated tubers in 2-3″ layers of coarse vermiculite. It helps maintain the moisture while minimizing the chance of rot. Leave the cover slightly off so moisture can escape.

I keep our tuber tub in the garage because its dark and kept at a cool 40ºF, but you can store yours anywhere that is dark and between 40º and 50ºF. Pick an easily accessible location, because you want to make it easy to check every month or so for rot.
Happy dividing!
[…] For detailed step-by-step directions, check out my post on How to Dig and Divide Dahlia Tubers. […]
[…] want to grow their own dahlias. But are hesitant to take the next step because they’re scared of tuber division. But I’m going to share the same secret I tell […]