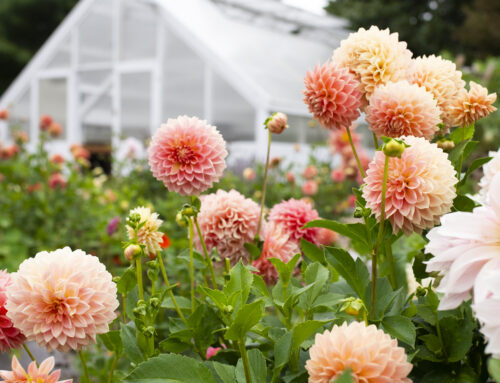
Dahlias are my BBF’s. Best buds forever! These beauties come in hot by mid to late summer and finish strong. They’re blooming well into the fall until hit by the first frost. I cannot get enough of these stunners, so let me tell you why and how to grow them yourself. Hint: They’re easy!

Reasons I love dahlias:
- Big, breathtaking, show-stopping blooms!
- They flower for almost 3 straight months.
- Long stem length.
- The more you pick, the more you get!
- Easy to grow.
- They literally multiply over the growing season.
- Buy one tuber, have it for life!
- They add drama, color and height to the garden.
- Make incredible bouquets and arrangements
- Do I need to keep going?

Origins of Dahlia Fever
Honestly, I came by my love of dahlias from my mom. I can still remember my mom’s dahlia border in our backyard. When I was really little, it felt like a forest with jurassic-sized blooms standing up above. As I grew and got older, it felt like her dahlias aged well, like a fine wine. That may have been because were had 6 years of temperate NJ winters in which my mom left the tubers in the ground. And every year they got bigger, and bigger and bigger! Until that one year we had a rough winter—cue the sniffling—and she lost those plants. My mom did get new tubers the following spring, however she dug them up every year thereafter.

Nostalgia is a powerful motivator. Those memories are what pushed me to grow my own dahlias when my husband and I moved to Maine and bought a house 12 years ago. I started with 6. Then before you knew it I had over 100 dahlias growing. How that happens is a mystery.

Dahlias are bewitching. Every year I promise my husband I won’t buy any more varieties. This is the only time I ever lie to him. The funny part is, he knows every spring at least one box of tubers is going to arrive in our mailbox. Now I strictly limit myself to 30 dahlia plants in the garden.
Where to Start
When I talk to everyday gardeners, I hear how they want to grow their own dahlias. But are hesitant to take the next step because they’re scared of tuber division. But I’m going to share the same secret I tell them:
Growing—and dividing—dahlias is actually super easy!
So, I’m going to share with you everything I know about how to grow dahlias (and dividing them). Then once you’ve become the dahlia growing guru I know you’re ready to be, YOU’ll need to share it too!

Dahlia Tubers come in all shapes and sizes
Step 1: Start with the dirt.
Dahlias thrive on organic matter. I prep my beds one to two weeks prior to planting, Before I top my beds with compost, I toss a generous handful of bonemeal and a general purpose fertilizer evenly on the bed. Then I spread a couple inches (2-3”) of compost (surf and turf) one top of the bed. I let that sit for a week or so
Step 2: Planting dahlia tubers.
Wait till all danger of frost has passed before you start planting. Dahlias are very cold sensitive, and their tubers are as well.

Because space is at a premium in my garden, and I harvest regularly throughout the season, I space my tubers closer than average, about 12-18” apart. If you are planning for your dahlias to be more of an ornamental landscape plant, or know you won’t be able to tend your garden as often, give your plants double the space.

I dig the holes first. Before dropping the tubers in, I’ll add another dash of bonemeal and a fair amount of compost to the hole. Plant your tubers 4-6” deep, making sure to the tubers are positioned on their side, or horizontally, with the eye or sprout facing upward. Backfill with compost.
Then LABEL! While I do keep a map with varieties planted marked in the appropriate spot. I also put staked labels out in the garden. It sounds silly, but you cannot have too many labels.
Step 3: Irrigation and Mulch
Dahlias require lots and lots of water throughout the season. You don’t want to water from overhead since that can cause unpleasant disease and pest issues. So irrigation is a must.
Over the years I’ve used both drip line and drip tape. It simply depends on whether I have a long, straight line of dahlias to water, or if they’re planted in smaller bed. Either way I lay 2-3 lines of irrigation to ensure those dahlias get all the moisture they need throughout the season. Soaker hoses also work.

Then mulch heavily with straw or seaweed. Mulching is important. It reduces soil pathogens, curtails weeds, and retains soil moisture.
SIDENOTE: You can also use landscape fabric and plant through it.
Don’t begin watering until you see green sprouts emerge from the soil. Relax, as this can take up to four weeks. Then water deeply once a week. You can up this to 2-3 times a week in midsummer when the heat becomes too much for the dahlias.
Step 4: Pinch
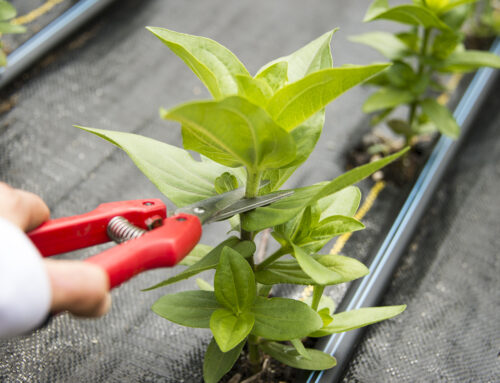
Once the plants reach 8-12” tall give them a hard Pinch. This is the hardest part even for me, and I’ve done this for years on many of my plants. But it works!

Cut out a 3-5” inches off center stem, just above two branching stems. This encourages the dahlia to grow more longer, stronger stems. Which will make you very, very happy once your plants start blooming!

For more details on pinching, check out my post on How to Pinch Flowers for Beginners.
Step 5: Keep it Up!
Continue watering. Soon you will begin noticing your plants are growing taller. This is your sign to start staking them.

The easiest and most efficient way to do this is to buy some t-posts (you can also use bamboo) and twine. Hammer in a post every 6-10 feet, or at each of the outside corners of the beds. Using the twine, wrap it around the posts at 12” increments, creating a cage.
You can also stake your dahlias individually by tying them to a single pole, or use metal cages.
Step 6: Harvest, harvest, harvest!
Enjoy the dahlia bounty you grew! Once they begin blooming, it’s time to reap the rewards of all your hard work. It’s best to harvest during the coolest part of the day. Typically this means early mornings or evenings when the sun isn’t out overhead. This ensures your stems will be hydrated.

Speaking of hydration, when you go out to the garden to harvest, bring a bucket of water. Cut and place immediately in the bucket to keep the stems turgid and strong.
Unlike most flowers, dahlias won’t continue to open up once cut. So harvest them when they’re 1/2 to 3/4 of the way open. And cut them deep! Don’t be afraid of losing all that stem length.

Remember, the more you cut….the more they flower! Dahlias are a powerhouse producer. You will find yourself rewarded with more stems and more blooms than you know what to do with.
Dahlias don’t have the longest vase life. Expect 5 good days with flower food. Remember to cut and change their water daily to make them last.
Step 7: Finish the season strong
Harvest regularly and don’t let any of the flowers die on the plant. If they do, cut them immediately. Deadheading will help keep your plant from going to seed and initiating the end of the season wind down.

Step 8: Time to dig.
All good things must come to an end. Once you’ve had two killing frosts it will be time to dig and divide your tubers.

Don’t freak out, I’ve got you! Click HERE for an entire post devoted to how to dig and divide your dahlia tuber clump. I promise it isn’t as daunting as you imagine.
And just think … all those lovely, potato shaped tubers. Next year you can spread dahlias throughout your entire garden and share—or swap—with friends!
Once you’ve got a year of dahlia growing under your belt, your confidence is going to skyrocket. Cause it really is that easy! And you’ll be asking yourself, “why did it take so long to start growing dahlias?!”

See you next winter as all us dahlia lovers wait with bated breath for the farmers to release their tubers for sale.


